
Guides
How to Guide GPT Image 2.6 Edits with a Markup Layer
Recolor a vase with GPT Image 2.6 Flare using a transparent markup layer. Follow input preparation, settings, the exact prompt and result checks.
Ethan Wang
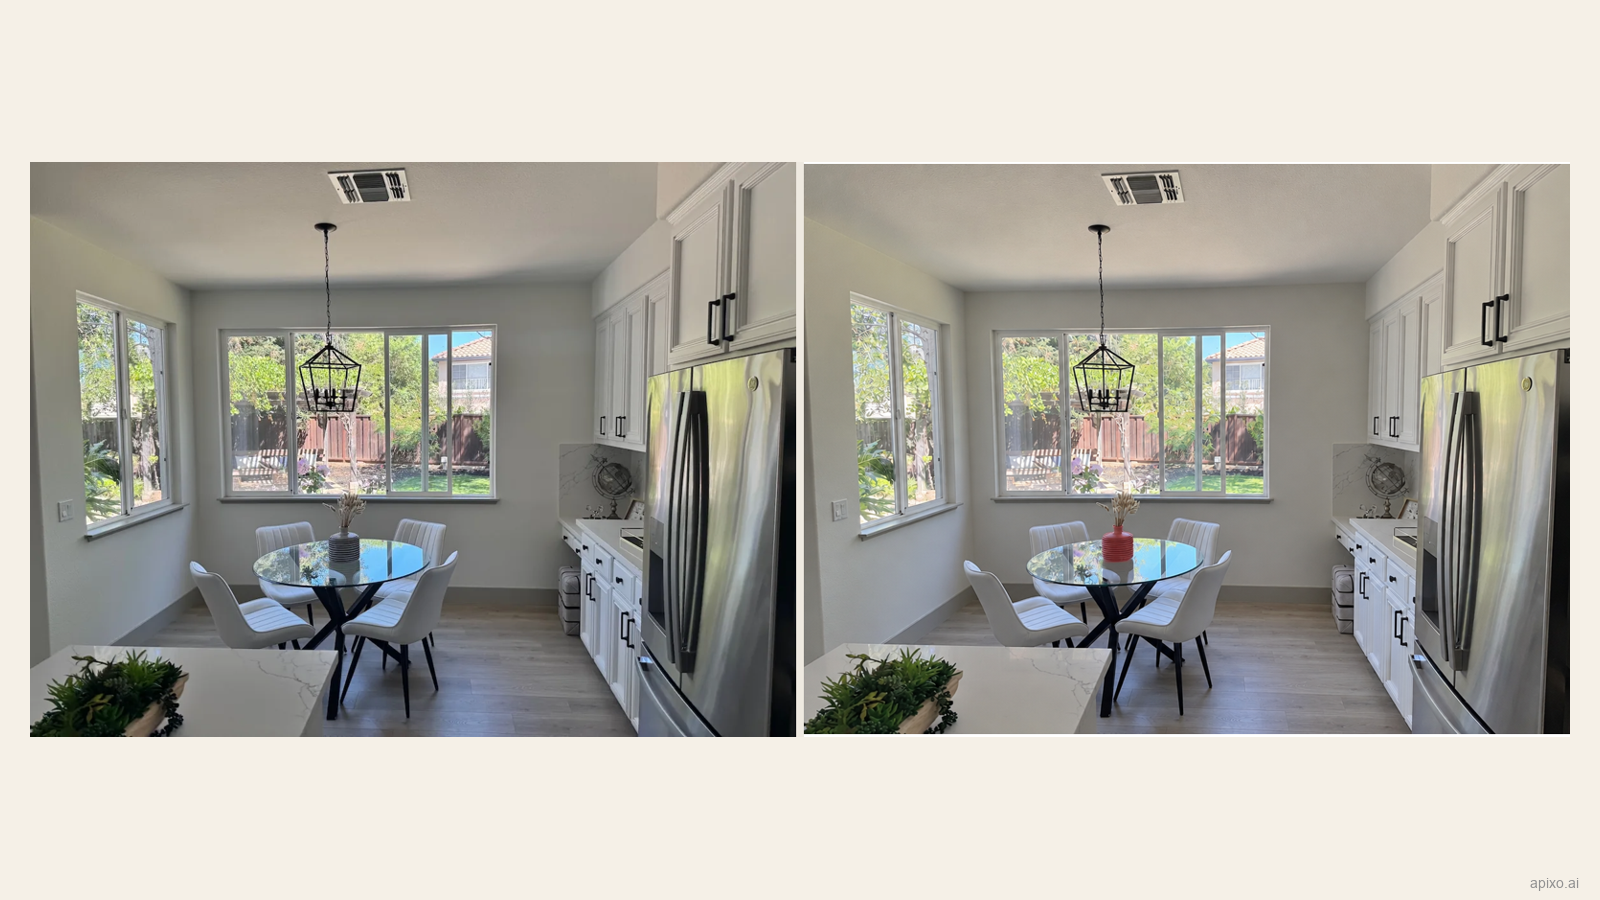
The kitchen source photo and the Flare vase edit.
A markup layer shows an image model which object you mean. In this tutorial, a red circle identifies a striped vase in a kitchen photo, and GPT Image 2.6 Flare recolors it coral red. Follow the source preparation, settings, prompt and result review below.
The source photo and transparent annotation come from OpenAI's image-generation guide. The comparison below uses our APIXO MCP result; the model-page walkthrough also includes a fresh browser-generated result.
Start with an image and an aligned annotation
The original contains a striped vase on a glass dining table. The supplied annotation is a red circle on a separate transparent PNG. Both files are 1200 × 900 pixels, and the annotation contains alpha transparency.
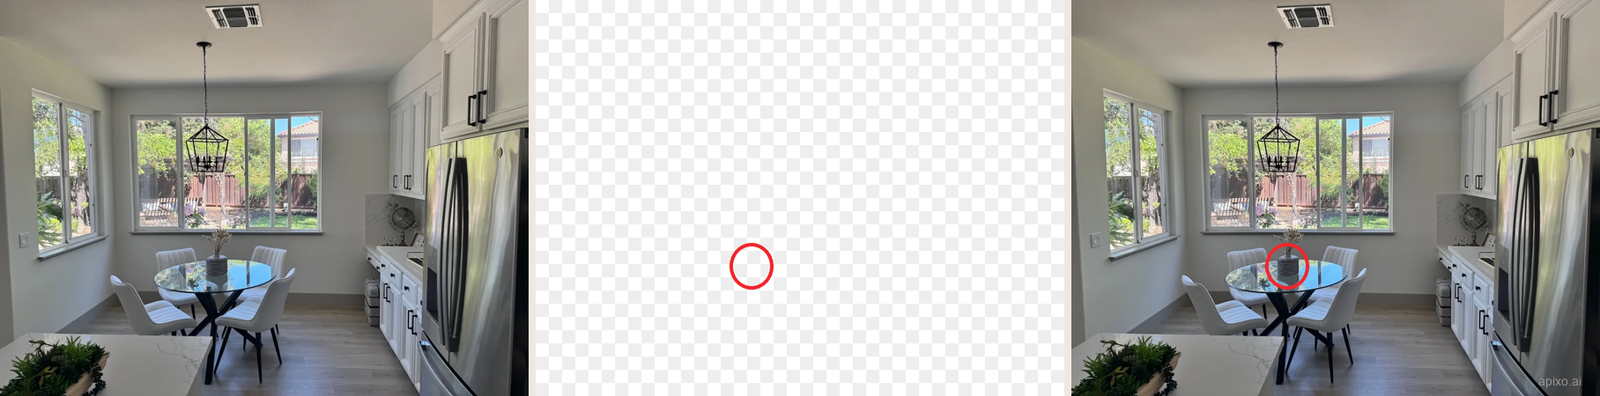
Download the original photo (WebP) · Download the transparent markup (PNG)
For your own image, use a clear, unobstructed target. Add a transparent layer in an editor, mark the object and export that layer alone. Retain the full canvas, dimensions and orientation of the source so the circle aligns with the target.
If the annotation preview looks black, inspect the alpha channel in an editor with a transparency checkerboard.
Keep reference and markup in separate inputs
The source photo goes first in image_urls. The transparent PNG goes into markup_url. We used one reference image and no mask. APIXO permits 1–16 ordered references, but extra images are unnecessary for this single-object test.
- Model: GPT Image 2.6 Flare /
gpt-image-2.6-flare - Mode:
image-to-image - Aspect ratio:
4:3 - Resolution tier:
1k - Quality:
medium - Complexity:
low - Output format:
png - Guide: One transparent markup PNG; no mask
See the APIXO model documentation for the fields. Choose either markup or mask; each applies to the first reference. This example uses markup.
Configure the model-page form
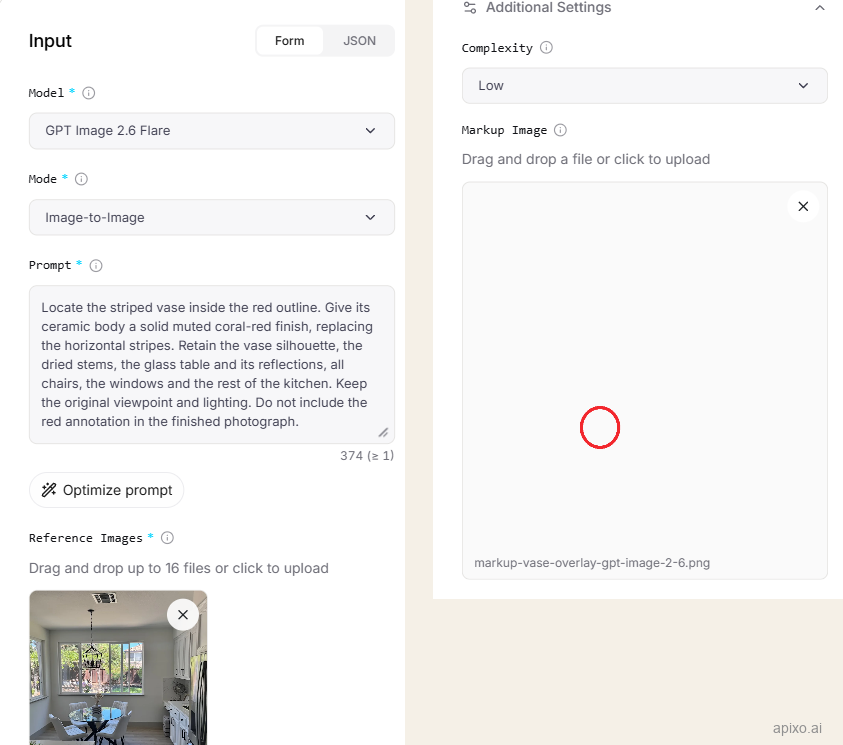
Open the model page and select Playground → Form. Choose GPT Image 2.6 Flare and Image-to-Image. Put the kitchen photograph in Reference Images. Expand Additional Settings, set Complexity → Low, and place the separate transparent PNG in Markup Image. Leave Mask Image unused. Set Aspect Ratio → 4:3, Resolution → 1K, Quality → Medium and Output Format → PNG.
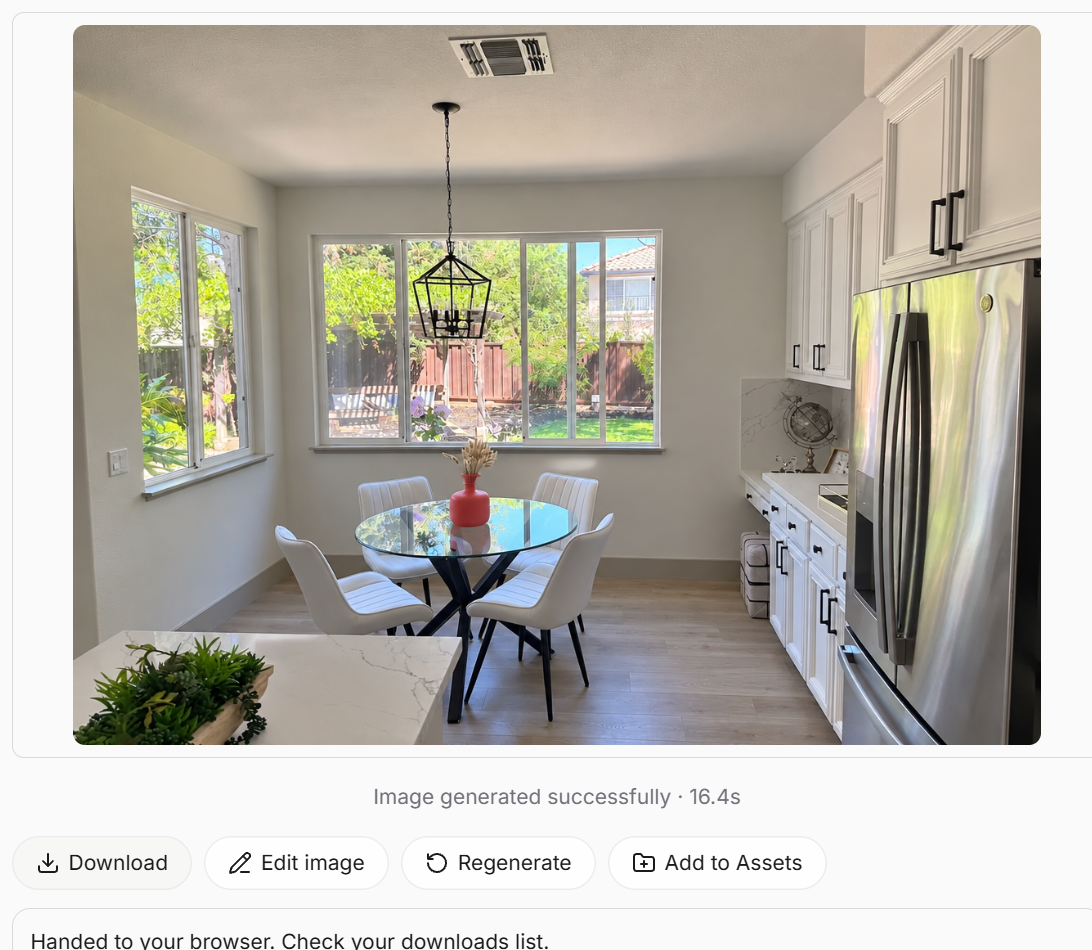
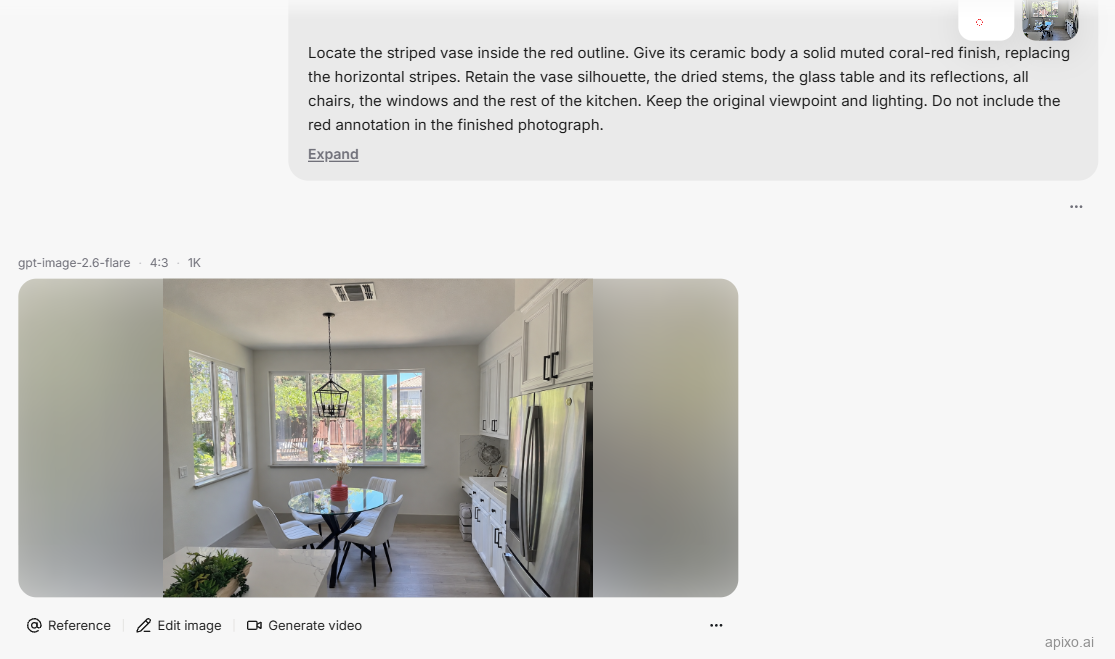
Upload kitchen-openai-original.webp from your computer into Reference Images, and kitchen-openai-markup.png into Markup Image. After both uploads finish, paste the full prompt below and click Generate. When the result appears, click Download to save the PNG. This upload-to-download workflow was completed with the settings above.
Optional: use AI Generator
In AI Generator, choose GPT Image 2.6 in the model-settings menu. The Add files (+) menu lists Reference Images, Mask Image and Markup Image. These are distinct roles. After adding a reference, GIF and SVG become disabled, matching the image-to-image output restriction.
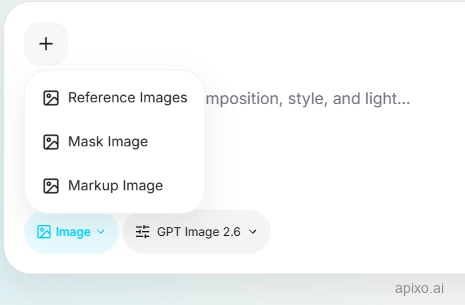
After uploading, the photo should show Manage Reference Images and the annotation Manage Markup Image. If both are labeled as references, use the model-page form above, which provides separate upload fields for the two files.
Ask for one change and identify what matters outside it
This is the exact prompt submitted for the recorded result:
Locate the striped vase inside the red outline. Give its ceramic body a solid muted coral-red finish, replacing the horizontal stripes. Retain the vase silhouette, the dried stems, the glass table and its reflections, all chairs, the windows and the rest of the kitchen. Keep the original viewpoint and lighting. Do not include the red annotation in the finished photograph.
The prompt states the color change first, then names the details to preserve so you can compare them after generation.
Check the result beyond the selected object
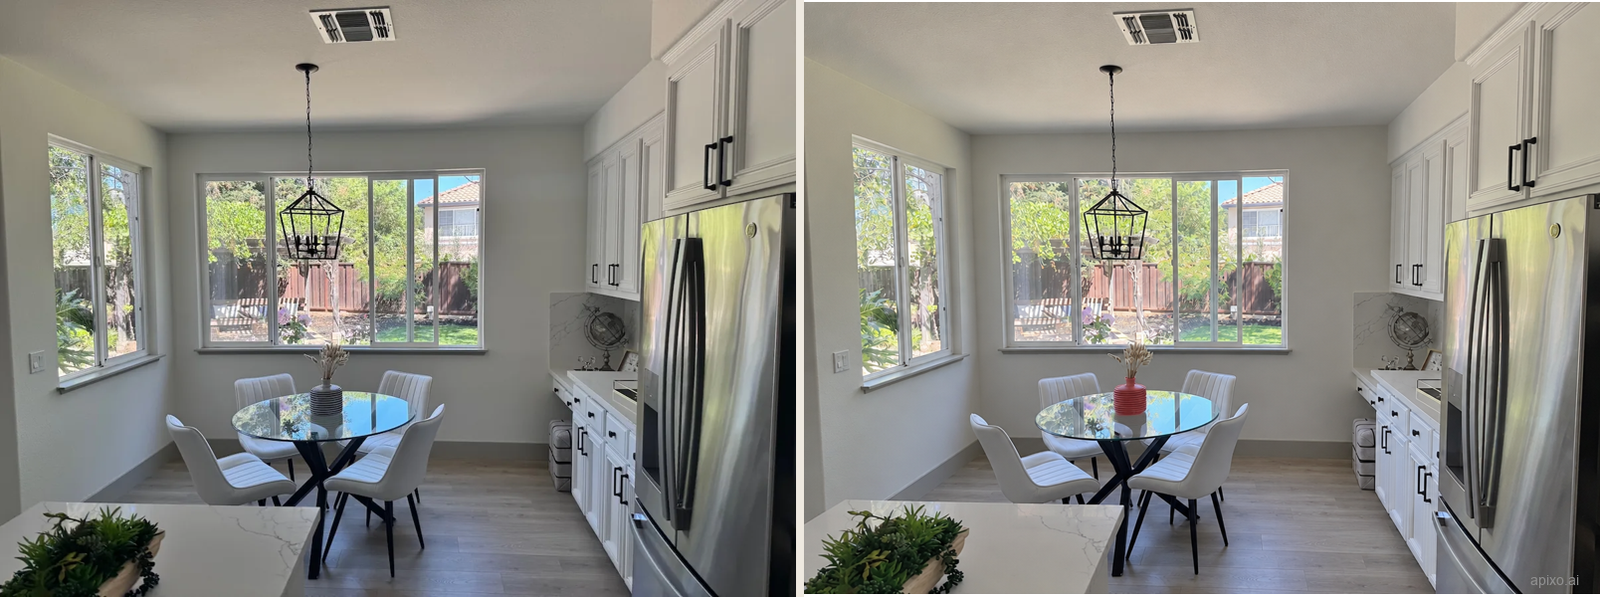
The vase became coral red and the circle disappeared. The room layout and furniture remain recognizable, while the overall image is brighter. Dimensions changed from 1200 × 900 to 1184 × 880. Pay particular attention to these differences when working with product or interior photos that need to retain their original surroundings.
The horizontal ridges remain in this result, although the prompt asks for a solid finish in place of the stripes. The color change succeeded; the surface change is incomplete. See the Flare and Sunburst comparison under the same settings for the different surface and shape changes.
Fix input problems before changing the recipe
If the wrong object changes, confirm that the source is first in the reference list and that the overlay still aligns after orientation. If the request rejects the guide, inspect its transparency, width and height and check that no mask was included.
If a circle appears in the finished picture, check whether you accidentally supplied a flattened photo instead of the separate annotation. Keep an explicit instruction to remove the guide.
If surrounding areas change, retain the original, overlay and prompt for a controlled follow-up. Change only one setting or only the model. For example, compare this low-complexity Flare request with a medium-complexity Flare request; separately, compare it with Sunburst using the same low setting. Record changes to the vase color, background brightness and furniture details, then choose the result that fits your use.
Reuse the method with your own image
Choose a photo with a clear target, add a separate transparent annotation, and describe what to change and preserve. Keep the source, annotation, prompt, settings and output together so you can refine the edit or share the recipe with your team.
Build with APIXO
Explore image, video, and audio models in one place.