
Guides
Combine outfits, poses and depth into a character storyboard for video
Plan a three-shot character story with Gia's outfit, pose and depth galleries. Build a master image, prepare storyboard frames and choose a video input mode.
Ethan Wang
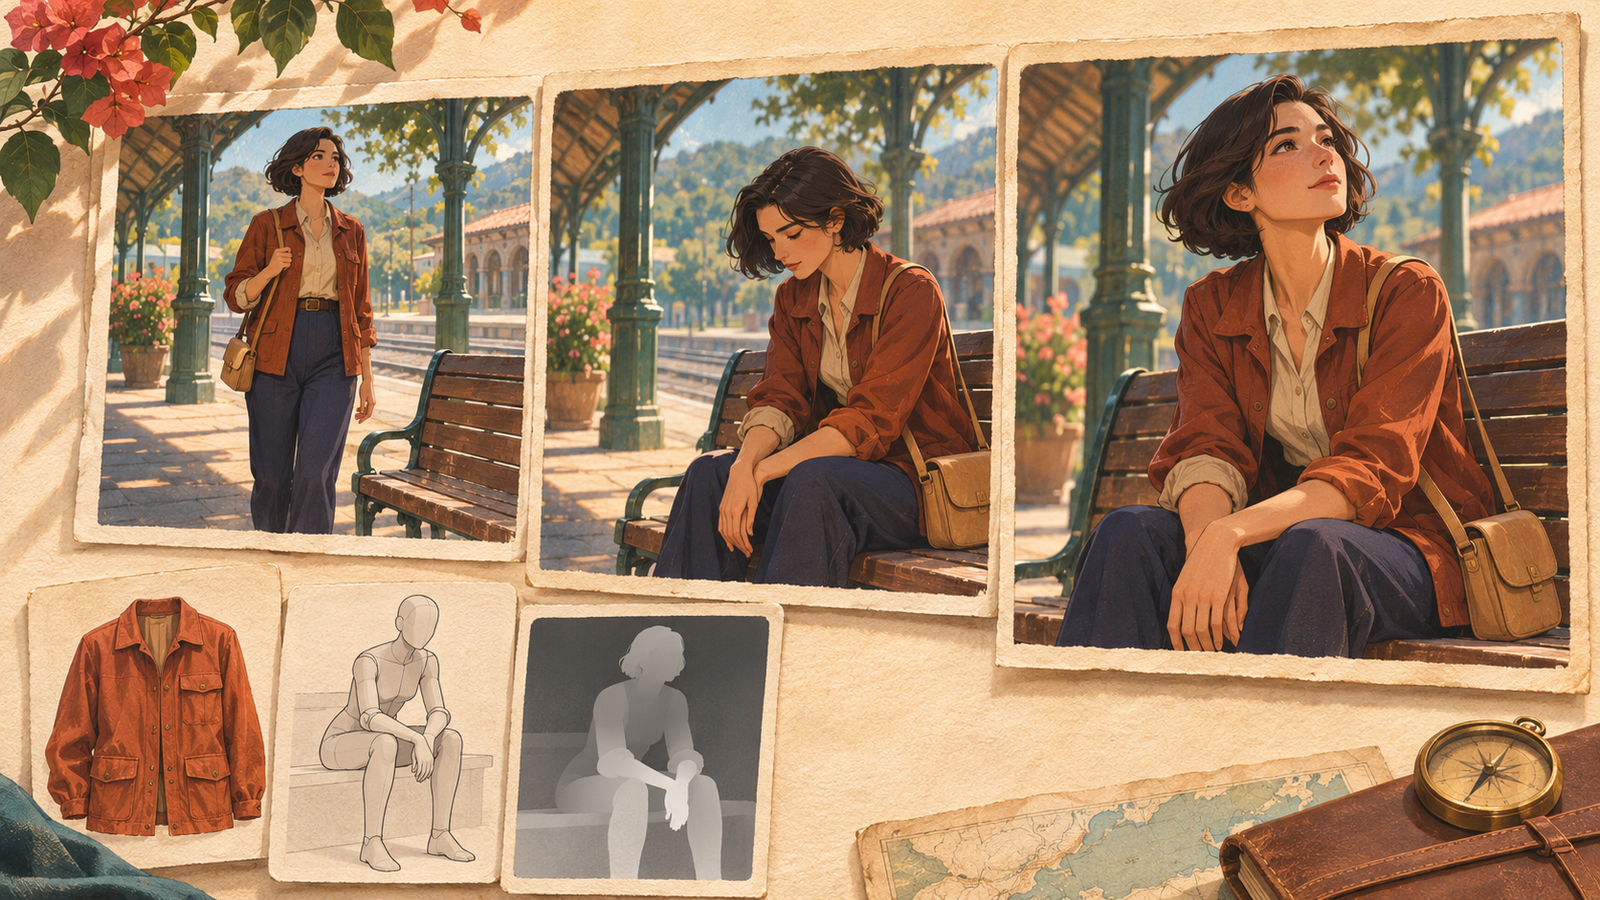
A traveler arrives at a station, sits to wait, then looks up to leave. Before feeding several galleries into a model, decide who the character is, what they wear, how they move and where depth actually helps. This three-shot plan separates those decisions.
Creator and project links
Original resource: POSE-DB-01, published by ギア (@giaaibusi). See the creator's announcement. COSTUME-ANIME-DB · COSTUME-DB-01 · POSE-DB-02
Original AI-generated concept illustration: outfit, pose and depth references inform three connected shots. Not source-gallery material or an actual video-generation result.
POSE-DB-01 · ギア
Start with Gia's original announcement, then adapt the references to your own project.
ギア · @giaaibusi
https://x.com/giaaibusi/status/2114916230226391550If the post does not load, open it on X.
Assign roles: choose one outfit style and add depth only when needed
Anime and realistic outfits offer different styling directions; choose one first. Your own adult fictional character image supplies identity, the outfit gallery supplies clothing, and the pose gallery supplies body placement and viewpoint. Add Depth only for a spatial problem such as a reaching arm or crossed limbs. More references do not automatically make the result more coherent.
Shot one: create a reusable character master
Choose a travel jacket and record its gallery URL, ID, colors, hairstyle and accessories. Combine character and outfit references into a complete station image. Inspect face, hands, collar and proportions before approving it. Use that character design for later frames instead of carrying every small error from one generation into the next.
Shots two and three: use poses to develop the story
Choose a seated pose for the second shot and a seated, upward-looking composition for the third. Keep the jacket, background structure and light direction consistent. Each finished still should communicate one action. If forearm and knee overlap is unclear, address that spatial problem in a compatible Depth workflow; otherwise skip Depth.
Animate one change per shot first
Plan standing, waiting and looking up as separate shots. A finished image can start image-to-video in Kling 2.6. For looking down and then raising the head within the same framing, Seedance 2.5 accepts 1–2 images in its first-and-last-frames mode. Do not force storyboard frames from different settings into one start/end pair. In multi-reference mode, specify which image supplies identity, clothing or composition; upload order is not a timeline. Give each shot one clear movement before deciding how to edit the shots together.
Check continuity before editing the shots together
Check hands, face and clothing within each clip, then compare hairstyle, collar, accessories, light and gaze between clips. Repair inconsistent seats or backgrounds in the stills. Connect shots through movement direction and gaze, keeping the portions that work. Unused poses can become another scene or a poster idea.
Leave room for the next project
The same character master can support a comic, styling dossier, teaser or seasonal story. Change one dimension next: retain the outfit and explore camera angles, or retain the pose and explore visual style. This makes the contribution of each reference visible without requiring all four galleries every time.
Explore each gallery in detail
Same character, new outfit: use references for anime clothing edits
Beyond “change the jacket”: outfit references for realistic clothing edits
Change the pose, keep the character: start with two reference roles
Depth, OpenPose or line art: choose what you need to control
Before you begin
These scenes and instructions are creative plans, not APIXO generation tests. Use your own adult fictional character and select individual references under the original gallery's terms; do not bulk-download or redistribute gallery images. Check the selected model's input mode and current cost.
Official sites and sources
Finish one character image first, then choose the video input mode.
Build with APIXO
Explore image, video, and audio models in one place.