
Comparisons
Depth, OpenPose or line art: choose what you need to control
Compare joint placement, outlines and spatial depth. Read ギア’s depth references and distinguish dedicated ControlNet conditioning from ordinary image inputs.
Ethan Wang
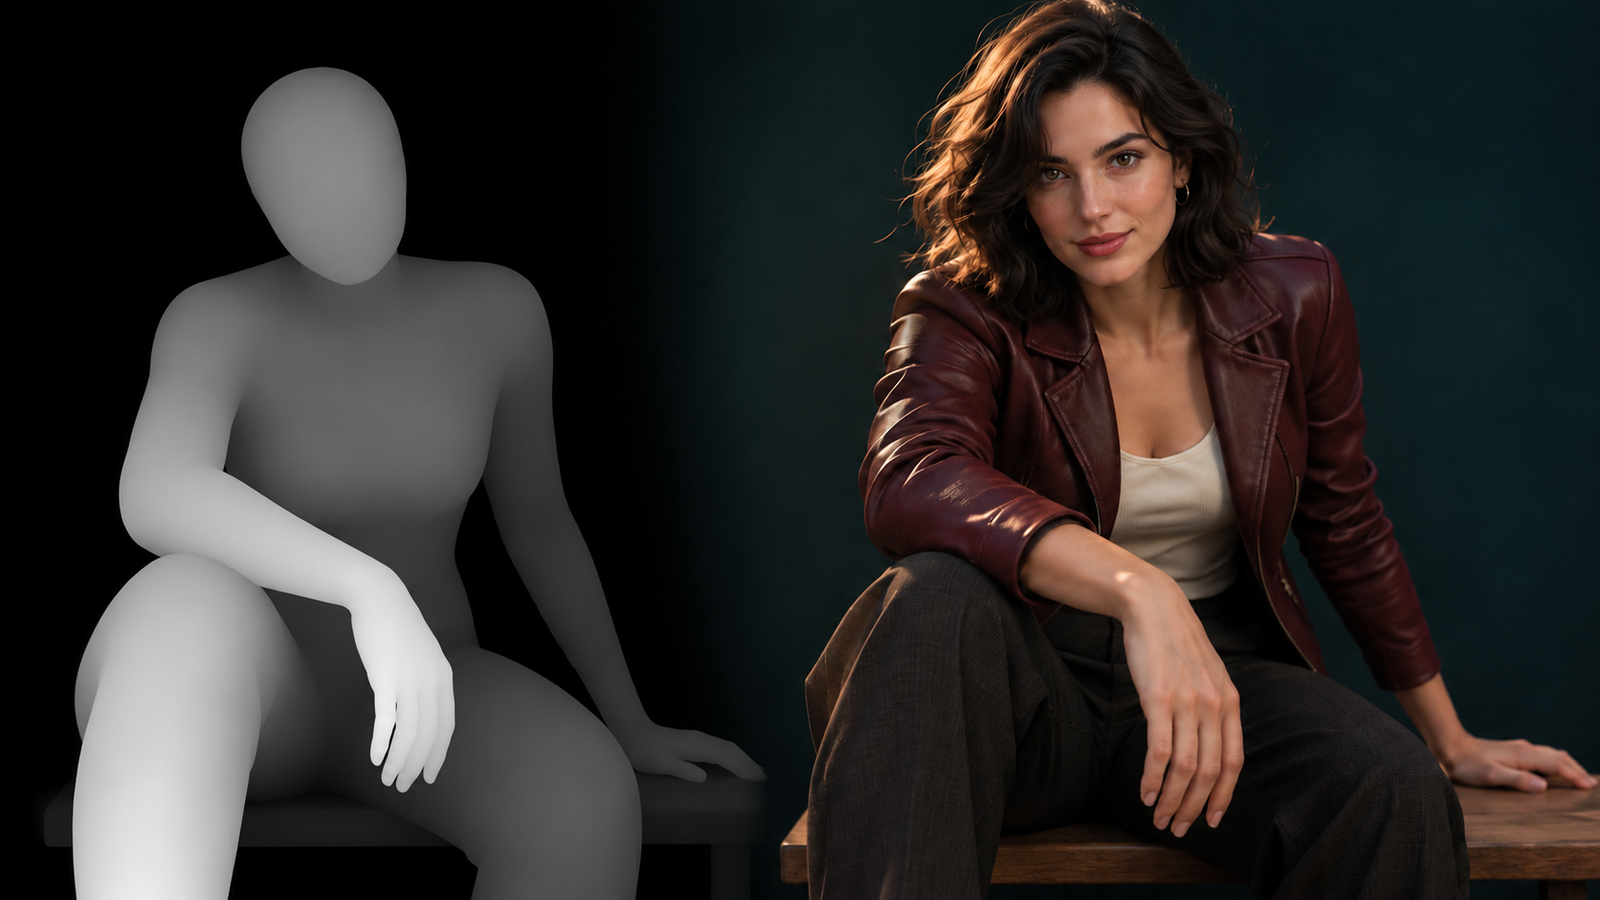
The hand is in the right place, but it does not feel closer to the camera. The legs point correctly, but their overlap is wrong. Before adding “accurate pose” to a prompt, decide whether the missing information is joint layout, visible contour or spatial depth. Then check whether the model actually accepts that type of conditioning.
Creator and project links
Original resource: POSE-DB-02, published by ギア (@giaaibusi). See the creator's announcement.
AI-generated concept cover: a grayscale mannequin illustrates spatial depth in a pose alongside an imagined cinematic character scene.
See how the creator presents this collection
Start with Gia's original announcement, then adapt the references to your own project.
ギア · @giaaibusi
https://x.com/giaaibusi/status/2116015273023250898If the post does not load, open it on X.
Choose the information you need to control
Joint and limb layout: OpenPose
An OpenPose pose map represents human keypoints rather than identity or clothing texture. Dedicated pose conditioning requires a compatible model and input path; a mannequin line drawing is not automatically the same data. The original ControlNet project describes separate human-pose and depth conditioning.
Readable action and silhouette: line art
POSE-DB-01 mannequin drawings help you inspect action, outline and viewpoint. Passed to an ordinary image editor, they provide visual guidance. Only an explicitly configured processing path can establish dedicated control; selecting a line drawing does not enable OpenPose.
Distance and overlap: Depth
POSE-DB-02 uses gray levels to describe front-to-back relationships, useful for discussing an arm reaching toward the camera or overlapping limbs. Depth does not lock identity, fabric texture or every finger. If dedicated depth conditioning is required, confirm a compatible model before choosing the map.
Brighter means nearer in this gallery
Read lighter regions as closer to the camera. The shading describes front-to-back relationships, not fabric colors or patterns. A pale arm overlapping a gray torso represents an arm positioned in front.
That convention belongs to this gallery. Before transferring an image to another tool, check its expected format and interpretation of brightness. Two grayscale images are not automatically interchangeable control inputs.
Use case one: establish an arm reaching toward the camera
Choose a depth reference with an arm clearly in front of the torso. Read its light-to-dark ordering, then use a compatible Depth workflow with a fixed adult fictional character and composition. Compare spatial layout: does the arm remain in front, is the hand-to-face scale plausible, and does the foreground hide a needed expression? This supports exploration of an inviting reach, pointing toward the lens or a close body composition. Finger boundaries still need their own check.
Use case two: resolve overlaps before preparing video frames
For crossed arms or overlapping seated legs, write down the occlusion order: which hand is nearer, which forearm crosses the other and which leg is in front. Prepare a clear finished image with the depth reference, then use that image for a small animated action or camera push. The raw grayscale map is neither a finished character starting frame nor a depth sequence for an entire video. If limbs must cross during motion, split the action into short shots and inspect whether their order flips. Explore spatial storytelling across shot sizes without changing both pose and viewpoint on every attempt.
APIXO image references and ControlNet Depth are different inputs
Dedicated Depth control needs a compatible model and conditioning input. The official ComfyUI example pairs a depth map with ControlNet. Uploading a grayscale image to an ordinary reference field does not activate that mechanism. Resolve the layout in a compatible workflow, then pass the finished character image to a video model.
Video models: Kling 2.6 · Seedance 2.5
Where to take the idea next
To combine clothing, poses and spatial layout, continue with the multi-gallery workflow from character references to video storyboards.
Before you begin
These scenes and instructions are creative plans, not APIXO generation tests. Use your own adult fictional character and select individual references under the original gallery's terms; do not bulk-download or redistribute gallery images. Check the selected model's input mode and current cost.
Official sites and sources
Finish one character image first, then choose the video input mode.
Build with APIXO
Explore image, video, and audio models in one place.